


For today’s Wedding Wednesday I have a fun little DIY project: Cupcake Poms!! Well, ok, I don’t know if that’s what they’re actually called, as I didn’t think this idea up on my own. I actually saw it on Pinterest, but when I went the original website it was in a different langauge. It looked so lovely and easy to make, though, that I thought I’d try it myself! And here are the results…

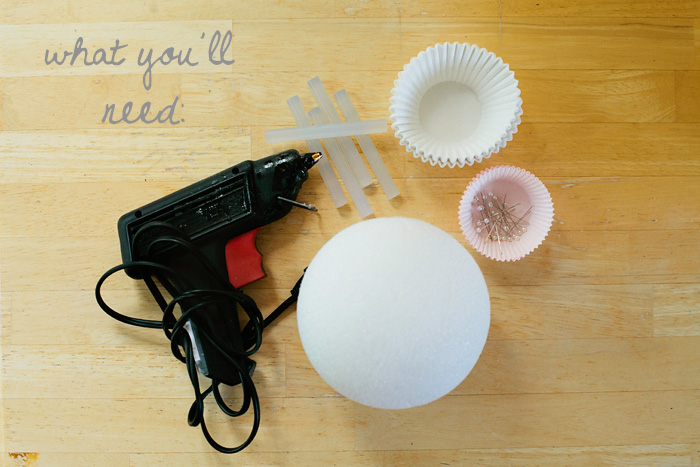
See?! Lovely, right?? Here’s the scoop on how to make them. For supplies you need a hot glue gun and glue sticks, a foam ball, cupcake wrappers, and sewing pins (make sure they have heads on them).
Poke the pin through the inside center of the cupcake wrapper. (This is why it needs a head, so that it stays in the wrapper.) A little tip, I would suggest getting pins a color that will match the colors of your wrappers, as they show through sometimes. For the colors I chose (white and pink), the pearl pins were perfect.
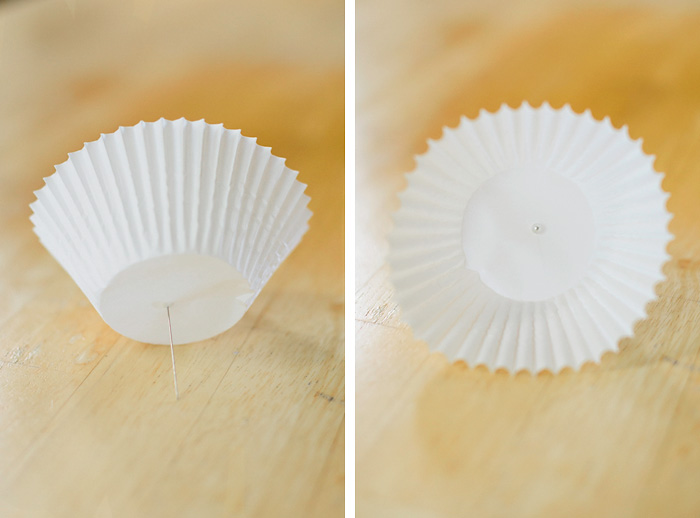
Once the pin is through, hold onto it and pull the wrapper back. You don’t have to be very gentle, but make sure to hold the pin head so it doesn’t rip through the wrapper. (I did that a few times.)
Next, place a drop of glue right where the pin comes out.
Once the glue is on, quickly push the pin and wrapper into the foam ball, making sure to push the pin all the way into the ball. A lot of the time it felt like it went in, but if I opened the wrapper a little I could see that it really hadn’t. So check it and push it all the way down if needed to be sure it doesn’t fall out. Although be careful not to burn yourself on this step… (I only did twice, which isn’t bad for someone who is somewhat craft challenged.)
Then just have at it! You don’t need to place the pins super tight because the wrappers cover a bit and you can play with them a little to shape them. For the two that I made, I got large white wrappers and regular pink wrappers. On the bigger foam ball I used mostly the white wrappers, with a few pink ones interspersed, and then all pink ones for the smaller foam ball.
And here is what they look like all finished.
(Oh and please excuse the cupcake decorating. I’m clearly not a baker, and as I found out this morning I don’t have the patience to be one, either. Ha.)
If I’m being totally honest, these were a little more challenging to make than I thought they would be. It definitely took me a while to get the hang of it. But by the end I was moving pretty fast! Just don’t expect to be able to whip one of these babies out in 15 minutes ;) Hope this inspires some of you!! And if you have any questions, don’t hesitate to ask. Happy Wednesday!

